3D Printing
Tips to remember when preparing your files for 3D printing
Jun 1, 2020
When we design a new product, we usually know everything about it. However, once we want to manufacture it or share it with the community, we need to prepare the 3D models to be used and manufactured by people that have not interacted with them before.
Here are a few essential tips to remember when preparing your files:
Watertight 3D model
A watertight or manifold 3D model consists of a closed mesh that creates a solid model. This means that if a manifold 3D model is filled with water, it will not overflow.
It is important to create watertight 3D models because the 3D printing slicing tools determine what parts should be printed, detecting which is the inside and outside of the model. This problem is common when designing with mesh-based 3D modelling tools. These are often used in the animation and games industry, and it is difficult to detect, especially when the 3D model is complex.
The best solution is to be careful when designing and to work with separate solid 3D models that can be later combined into one model. Some 3D printing slicing tools can detect non-manifold 3D models and warn the user.
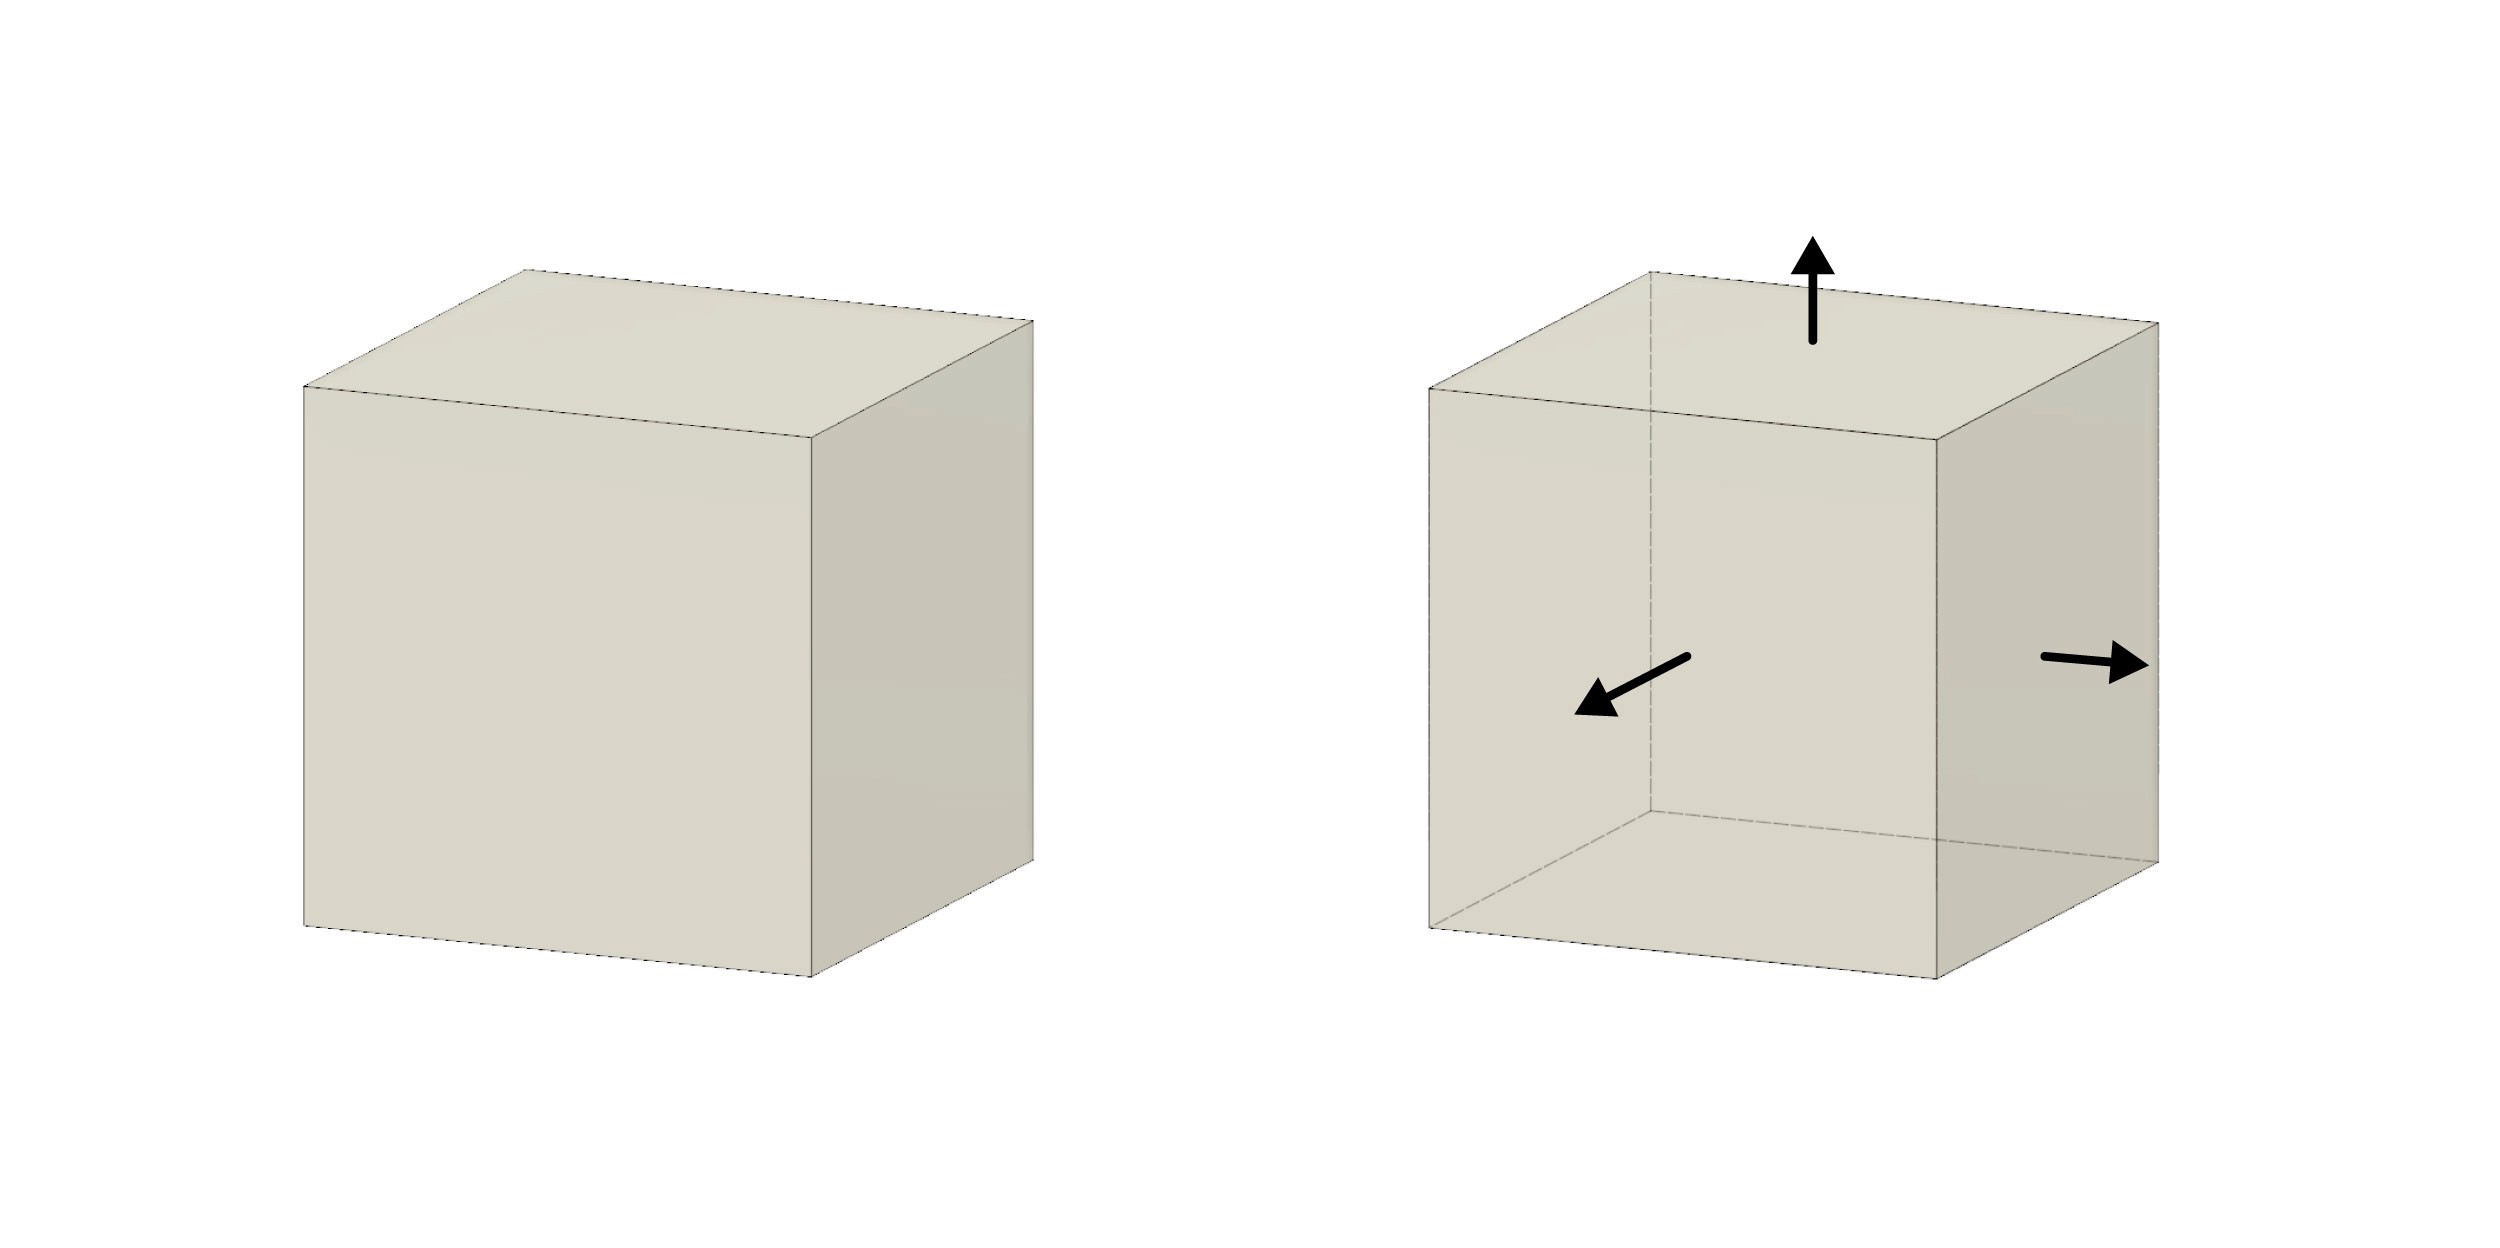
Inverted normals
Normals are directional vectors perpendicular to a polygon or surface. Each polygon has a surface normal, and it should always be facing outwards.
Reversed faces can cause issues when processing a 3D model because they are used to detect the inside of a 3D model. Mesh orientation is as important as watertight 3D models because it is used to detect a model's volume, and a reversed face can be interpreted as a hole in the mesh.
This issue is more common when using mesh-based 3D modelling tools, while CAD software usually works with solids that have predefined normals.
Wall thickness
While it is possible to design surfaces with no thickness, being usual in video games, it is necessary to transform the wall or surface into a solid object with thickness in order to 3D print it.
Trying to 3D print objects that contain walls with no thickness will cause similar issues to non-manifold 3D models as the wall does not have an inner part that can be 3D printed.
The wall thickness depends on how resistant or lightweight the model should be, but each 3D printing technology has a different minimum wall thickness. FDM 3D printing (Fused Deposition Modelling) usually requires a minimum wall thickness of 0.8mm or the equivalent of two times the diameter of the nozzle.

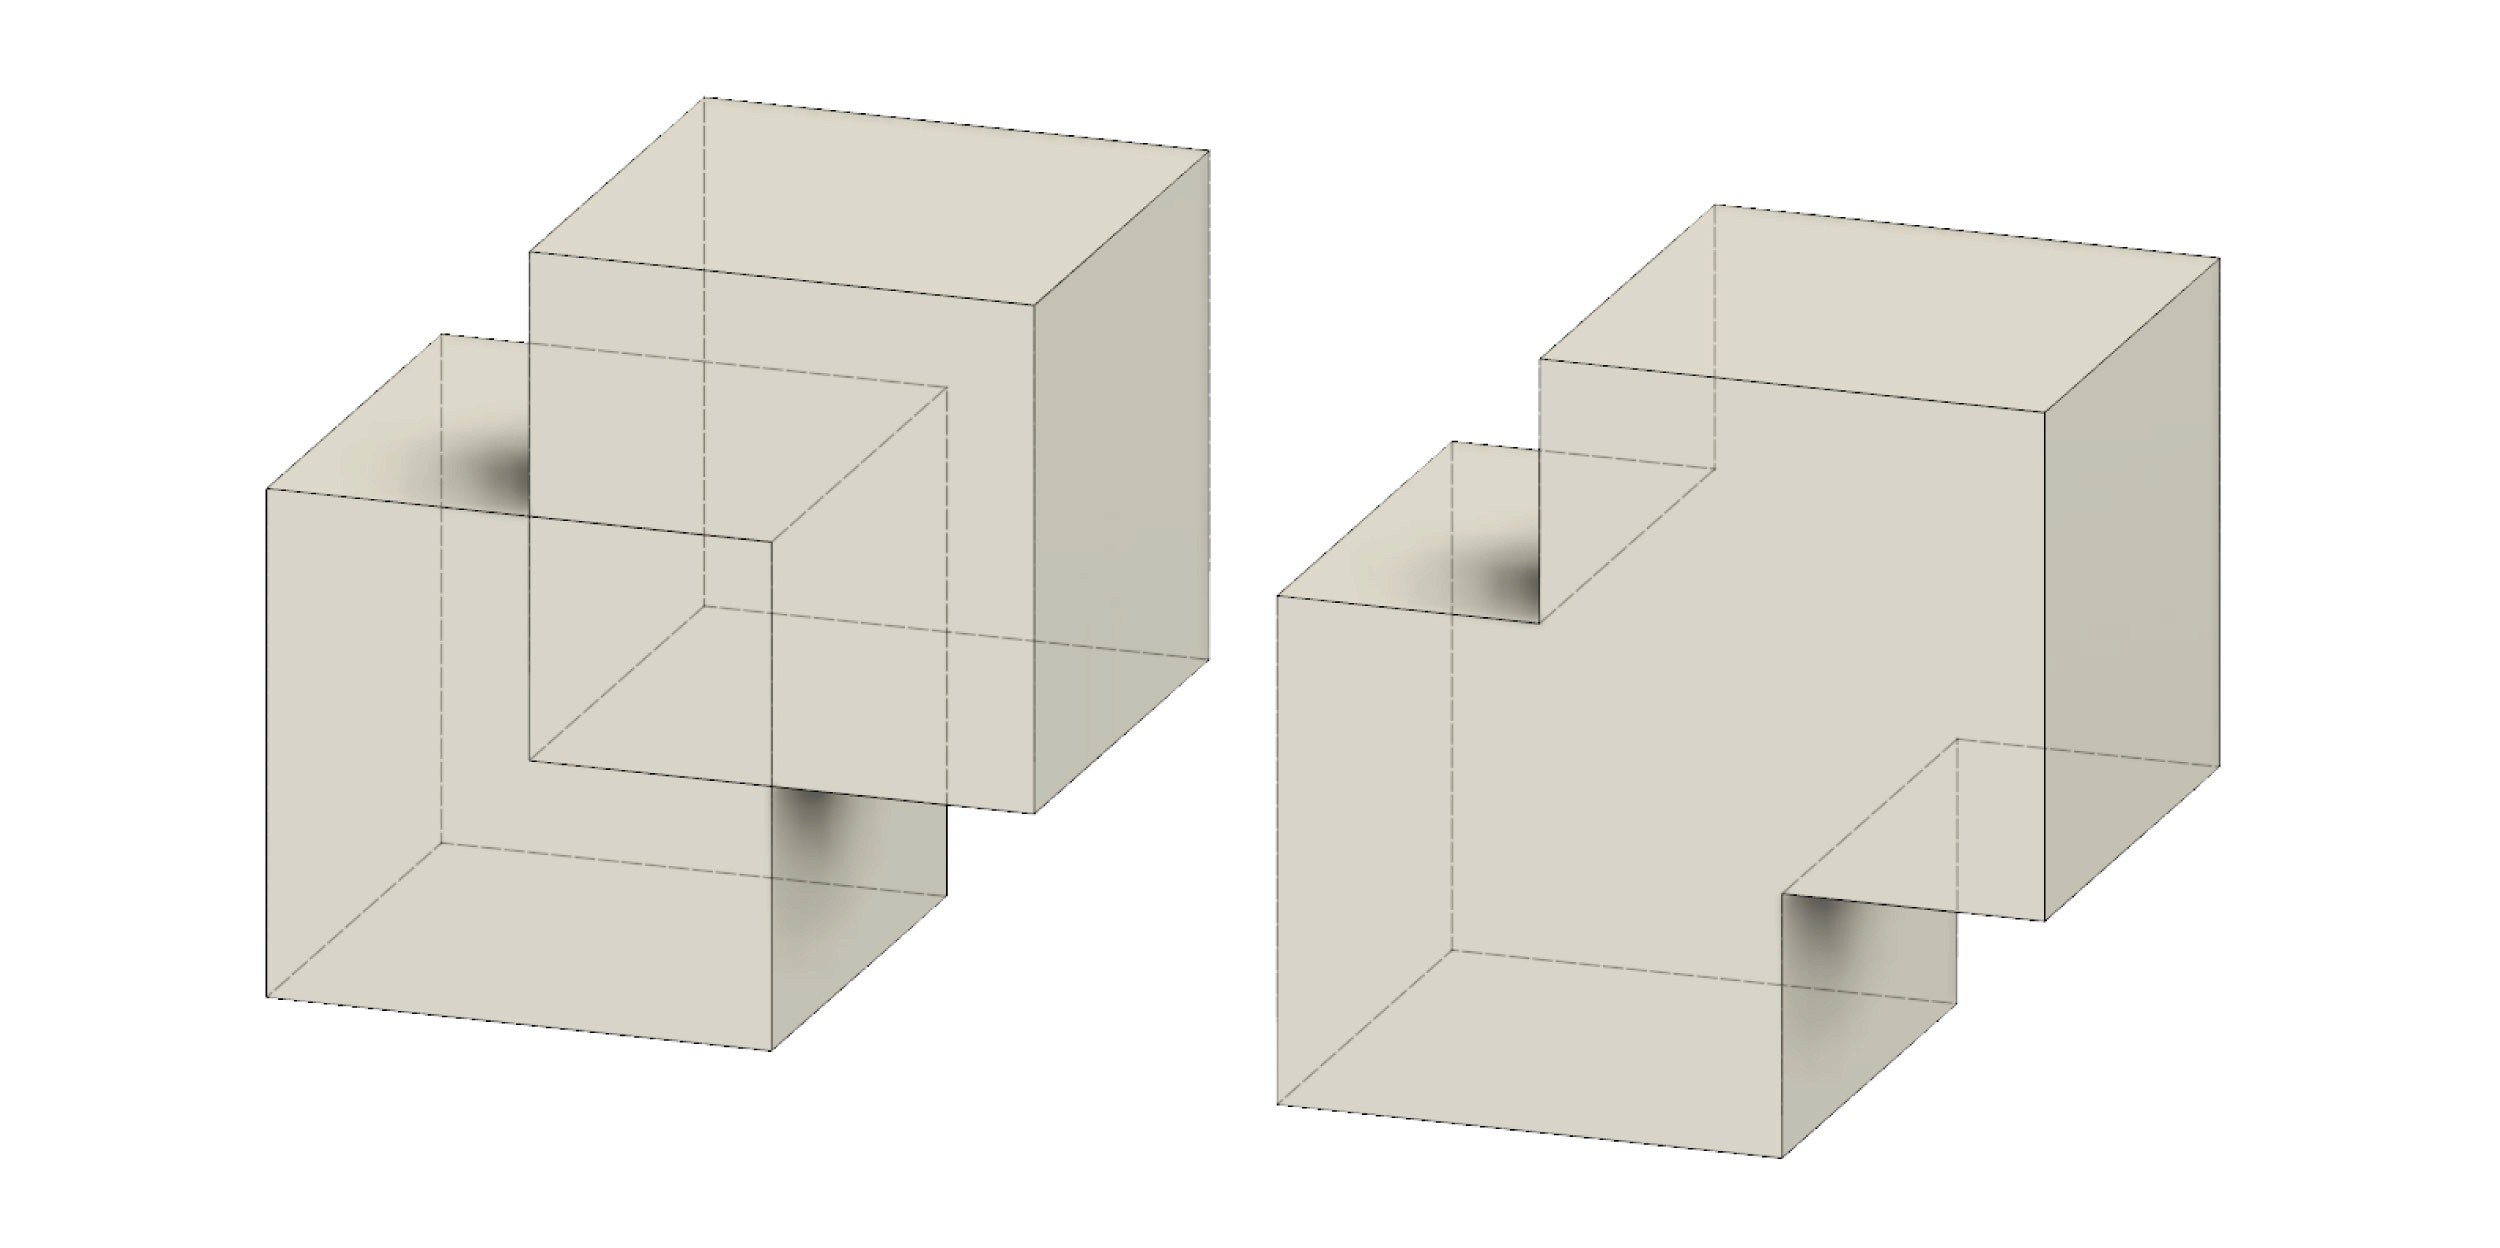
Mesh overlapping
When we work with multiple solid objects that intersect each other to form a larger model, we need to combine them together into one solid object before we export the 3D printing file.
When multiple solids intersect each other, walls with no thickness go through each solid and they can break the mesh, making it impossible to 3D print the object.
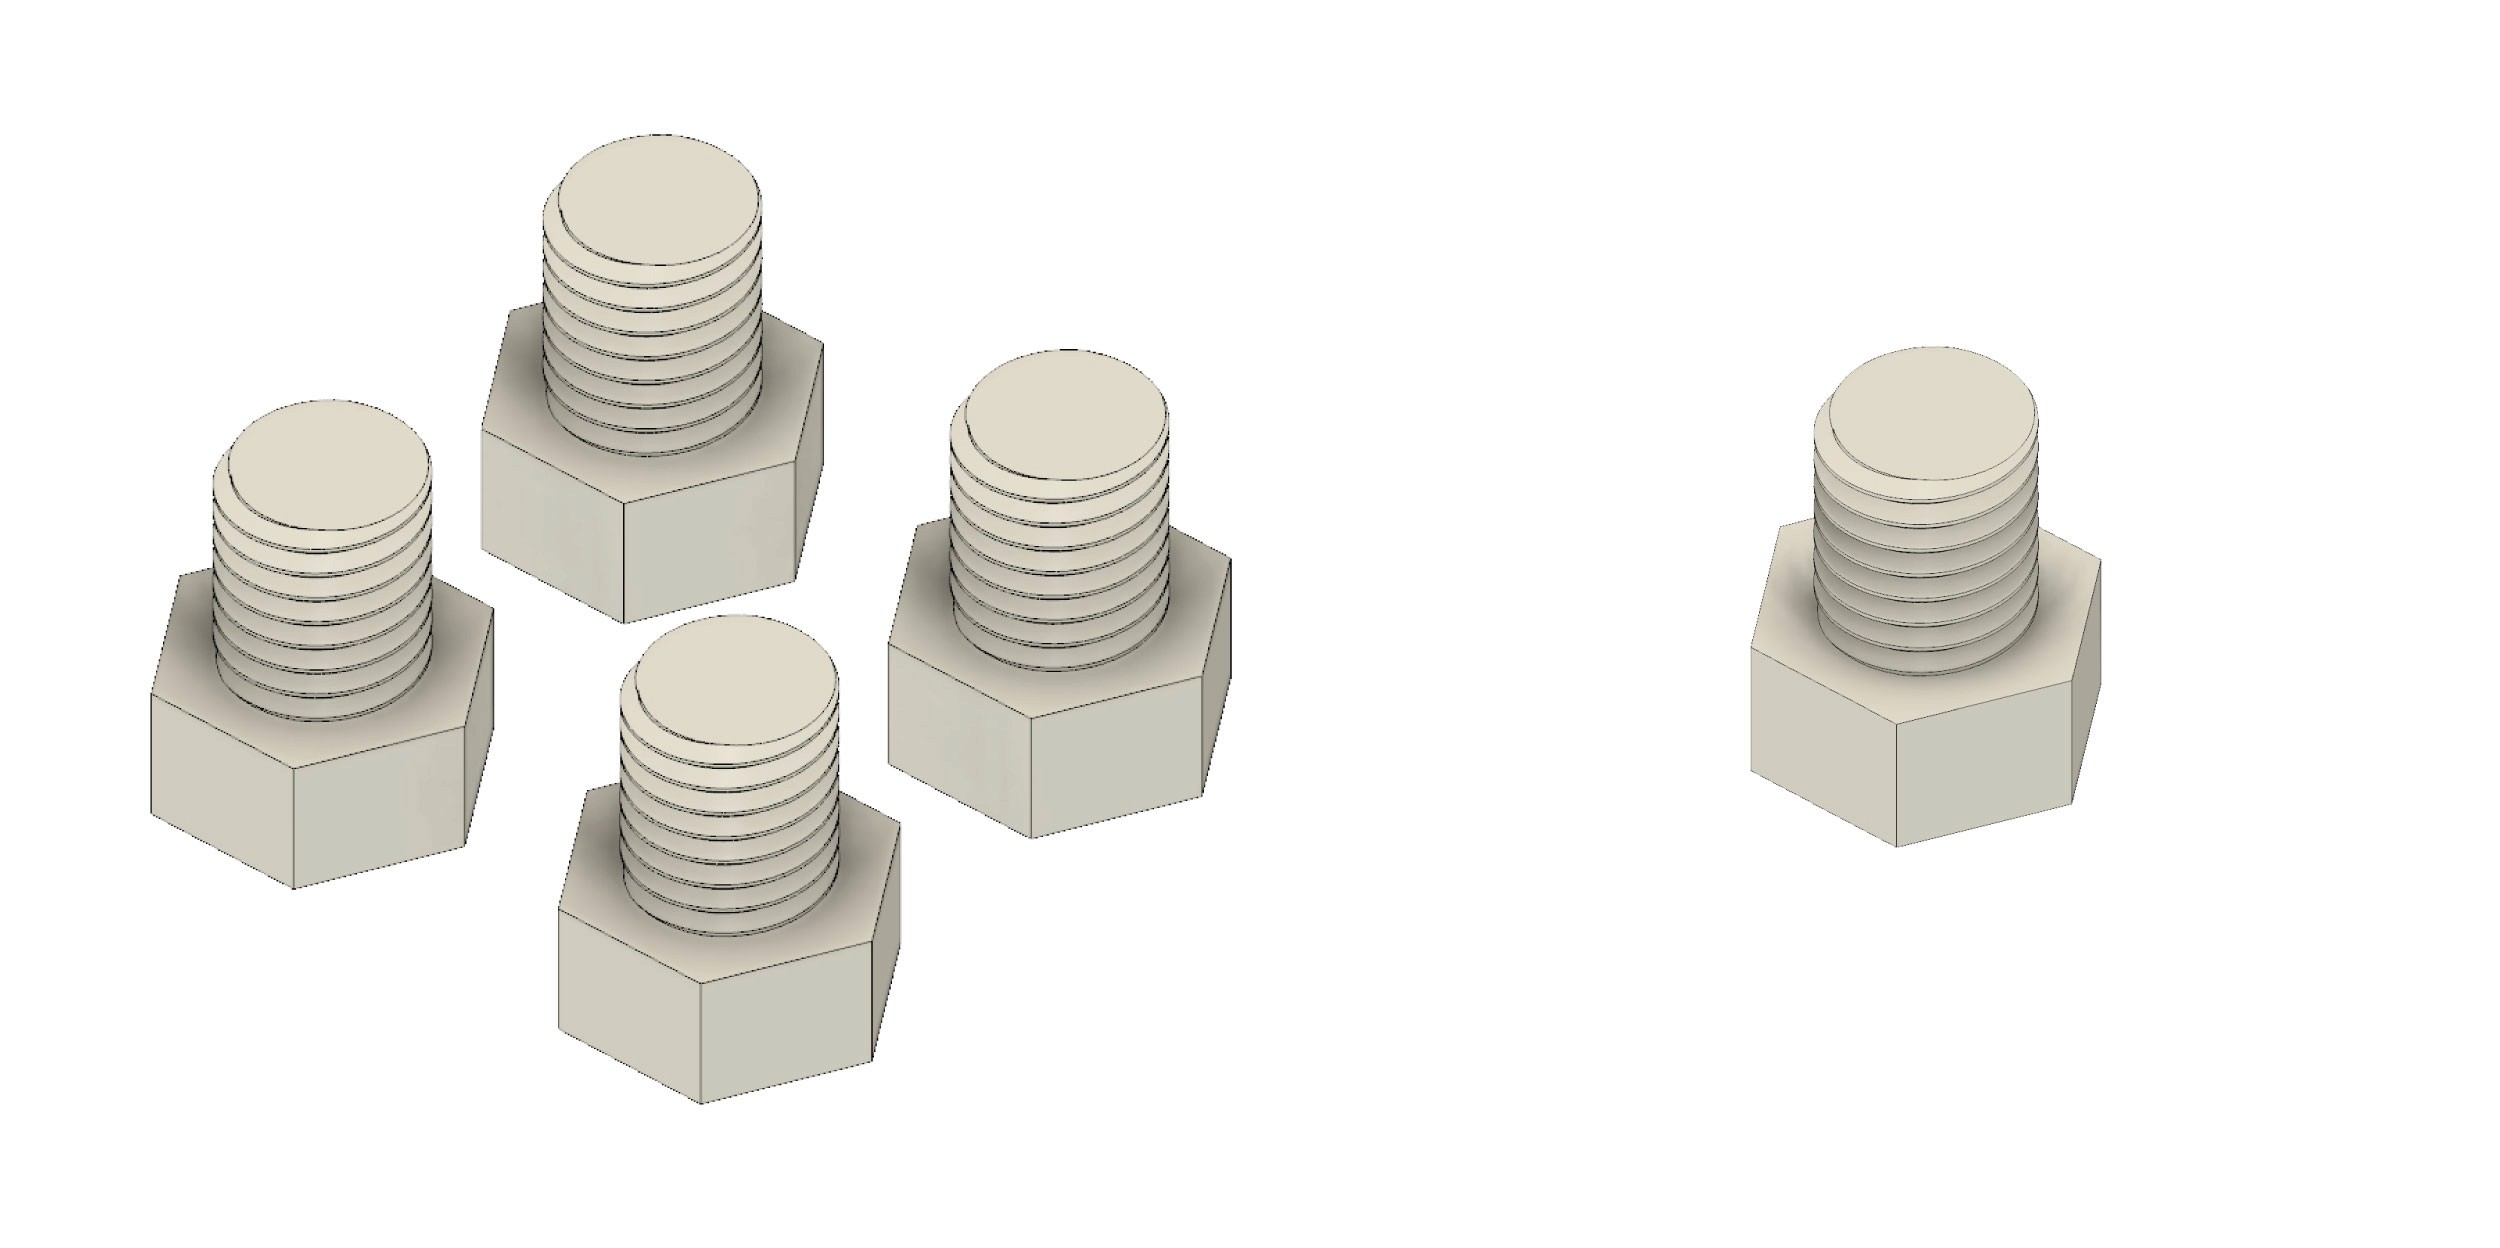
In the image below you can see two solid cubes. The ones on the left have not been combined and have intersecting meshes, while the ones on the right are combined into one solid using a boolean operation.
Models per file
Even though it is common to export many models in one file, especially when they are related or part of a mechanism, it is recommended to export each object individually in separate files.
Having a separate file for each model will be helpful when manufacturing and it will also allow project collaborators to print a single part, simplifying the process. If a project requires more than one unit of the same model, it is as easy as explaining it in the project description or BOM
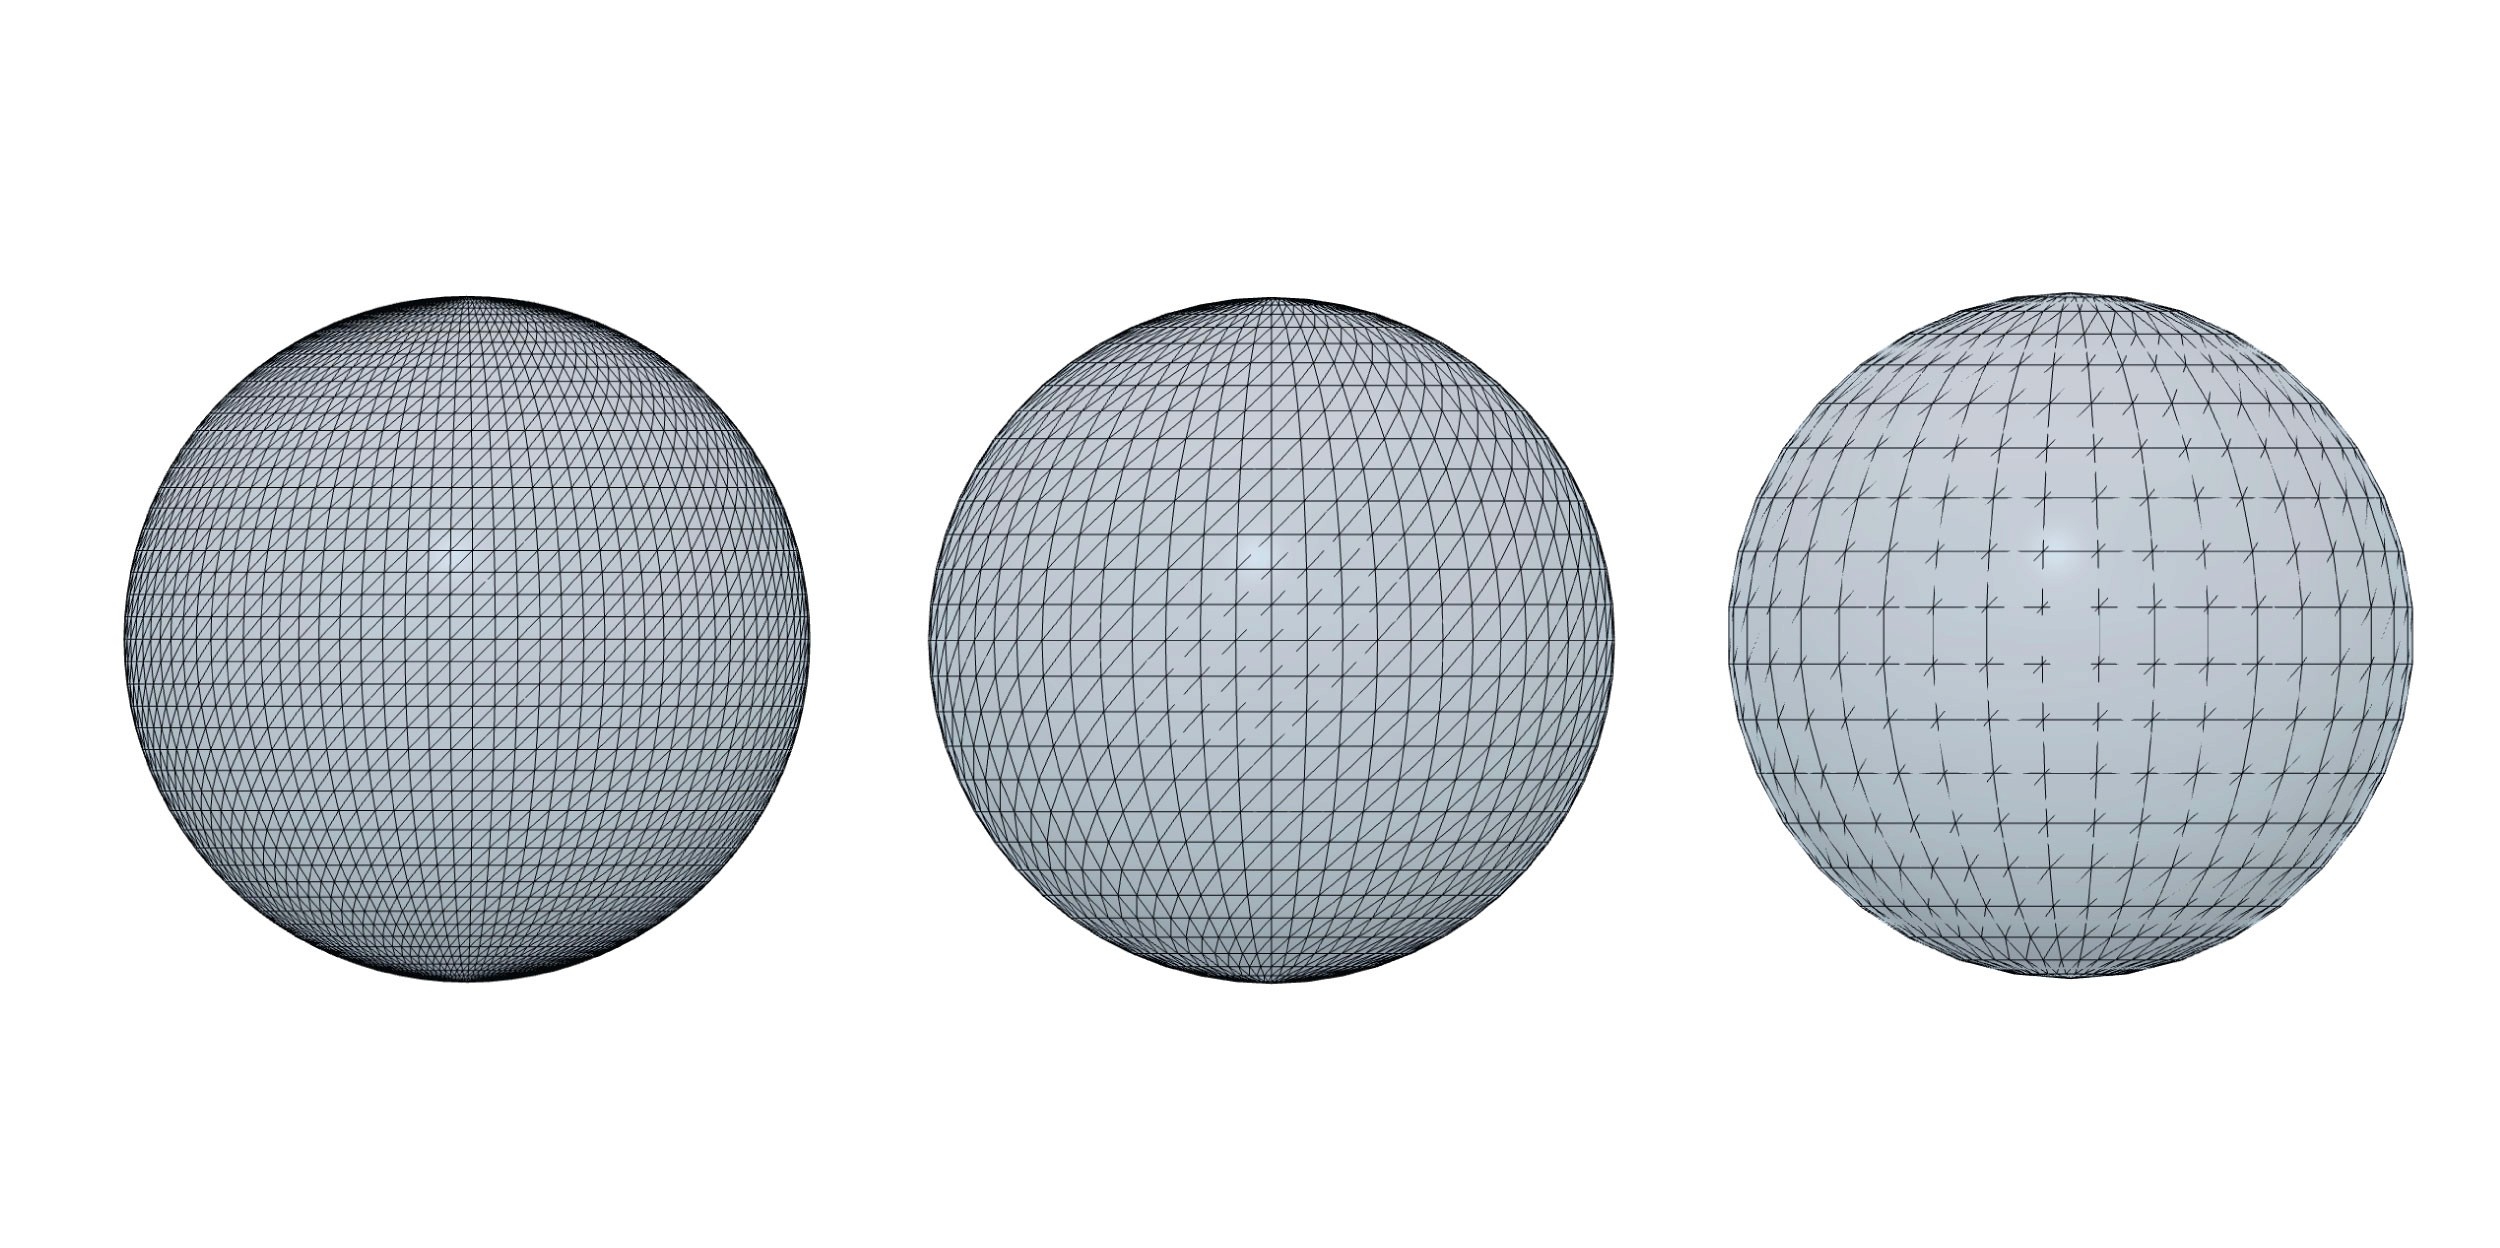
3D model resolution
The most common 3D printing file format is STL (Stereolithography), and its main feature is transforming every 3D model into a continuous triangular mesh.
Most 3D modelling software gives us the chance to set the mesh density. As it already happens with digital images, designs that have more details will offer a higher quality but the file size will also be larger.
It is recommended to test different mesh densities and find the right balance between print quality and file size. If you are working on an open-source project, the source files can also be shared, allowing collaborators to modify and export the 3D models with different mesh densities.
File format
The most common 3D printing file formats are STL, OBJ, AMF and 3MF.
While the STL format is the most popular, it is also the oldest and most limited, as it only contains a triangular mesh. The OBJ file is also quite popular as it's a common format when creating video game assets, and it can also encode materials, colours and texture.
The AMF and 3MF formats are more recent and were created specifically for 3D printing. The 3MF format, supported by most large 3D printing companies, is slowly being adopted as an industry standard, offering a high-quality experience when managing 3D model files.
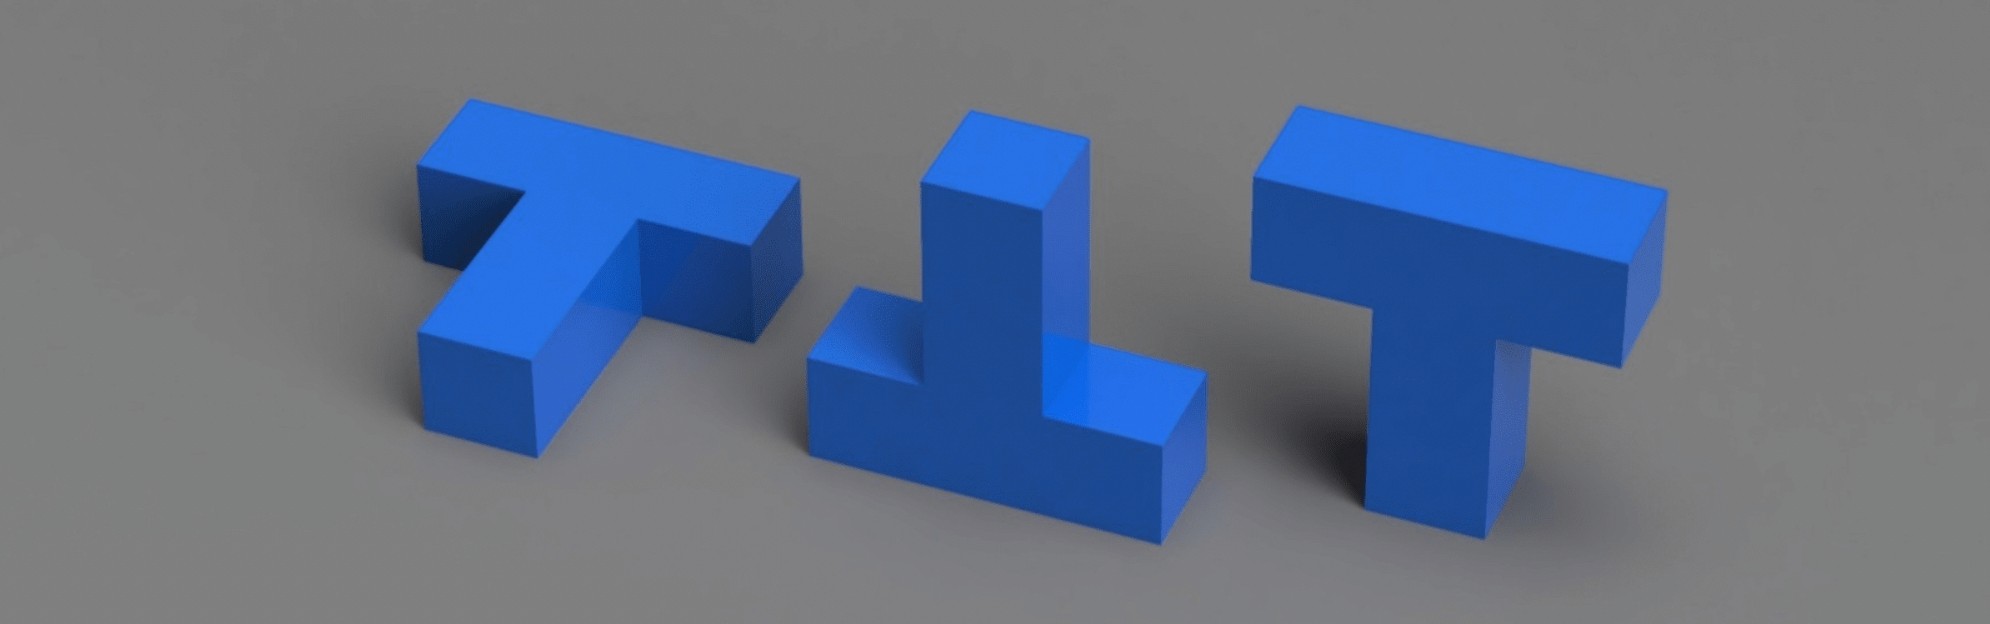
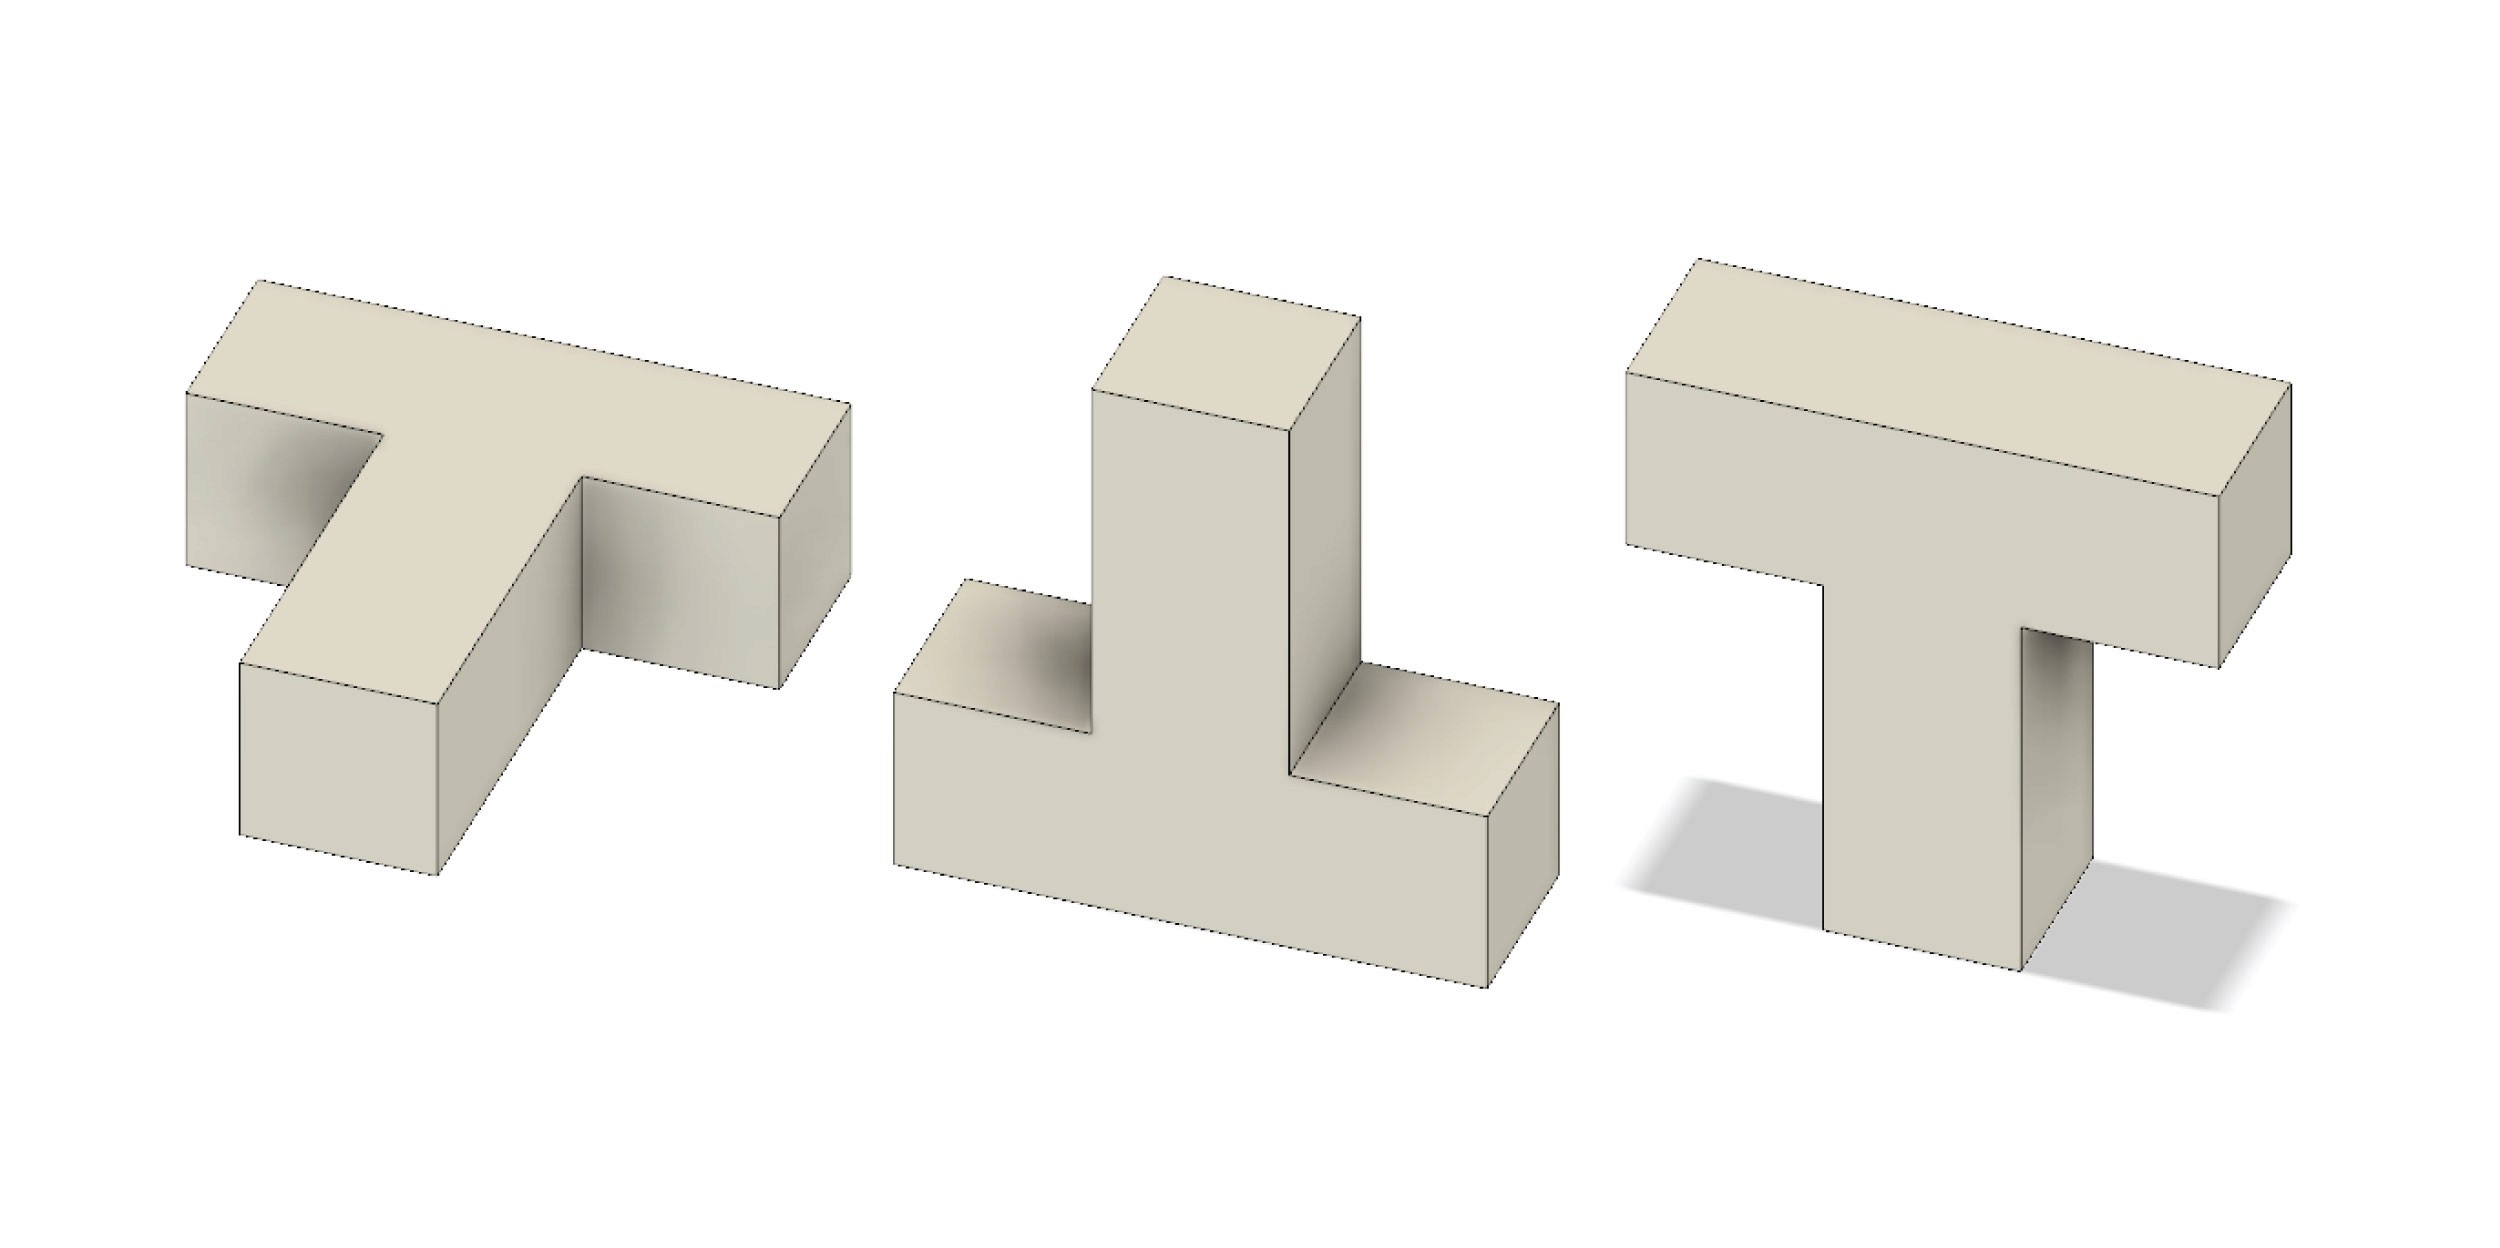
Model orientation
The way you orientate your 3D model before exporting will affect its accuracy, strength and surface finish. While SLS and SLA 3D printing may not be heavily affected by model orientation, FDM 3D printing has some limitations that affect model orientation.
Designs that are manufactured with FDM 3D printers should be orientated in a way that minimises support material while offering high strength and the best surface finish.
In the image below you can see three designs, each one orientated in a different way. The two from the left can be 3D printed with no support material on an FDM 3D printer, although the mechanical properties would be different. The model from the right would require support material and it would have similar properties to the model in the middle.
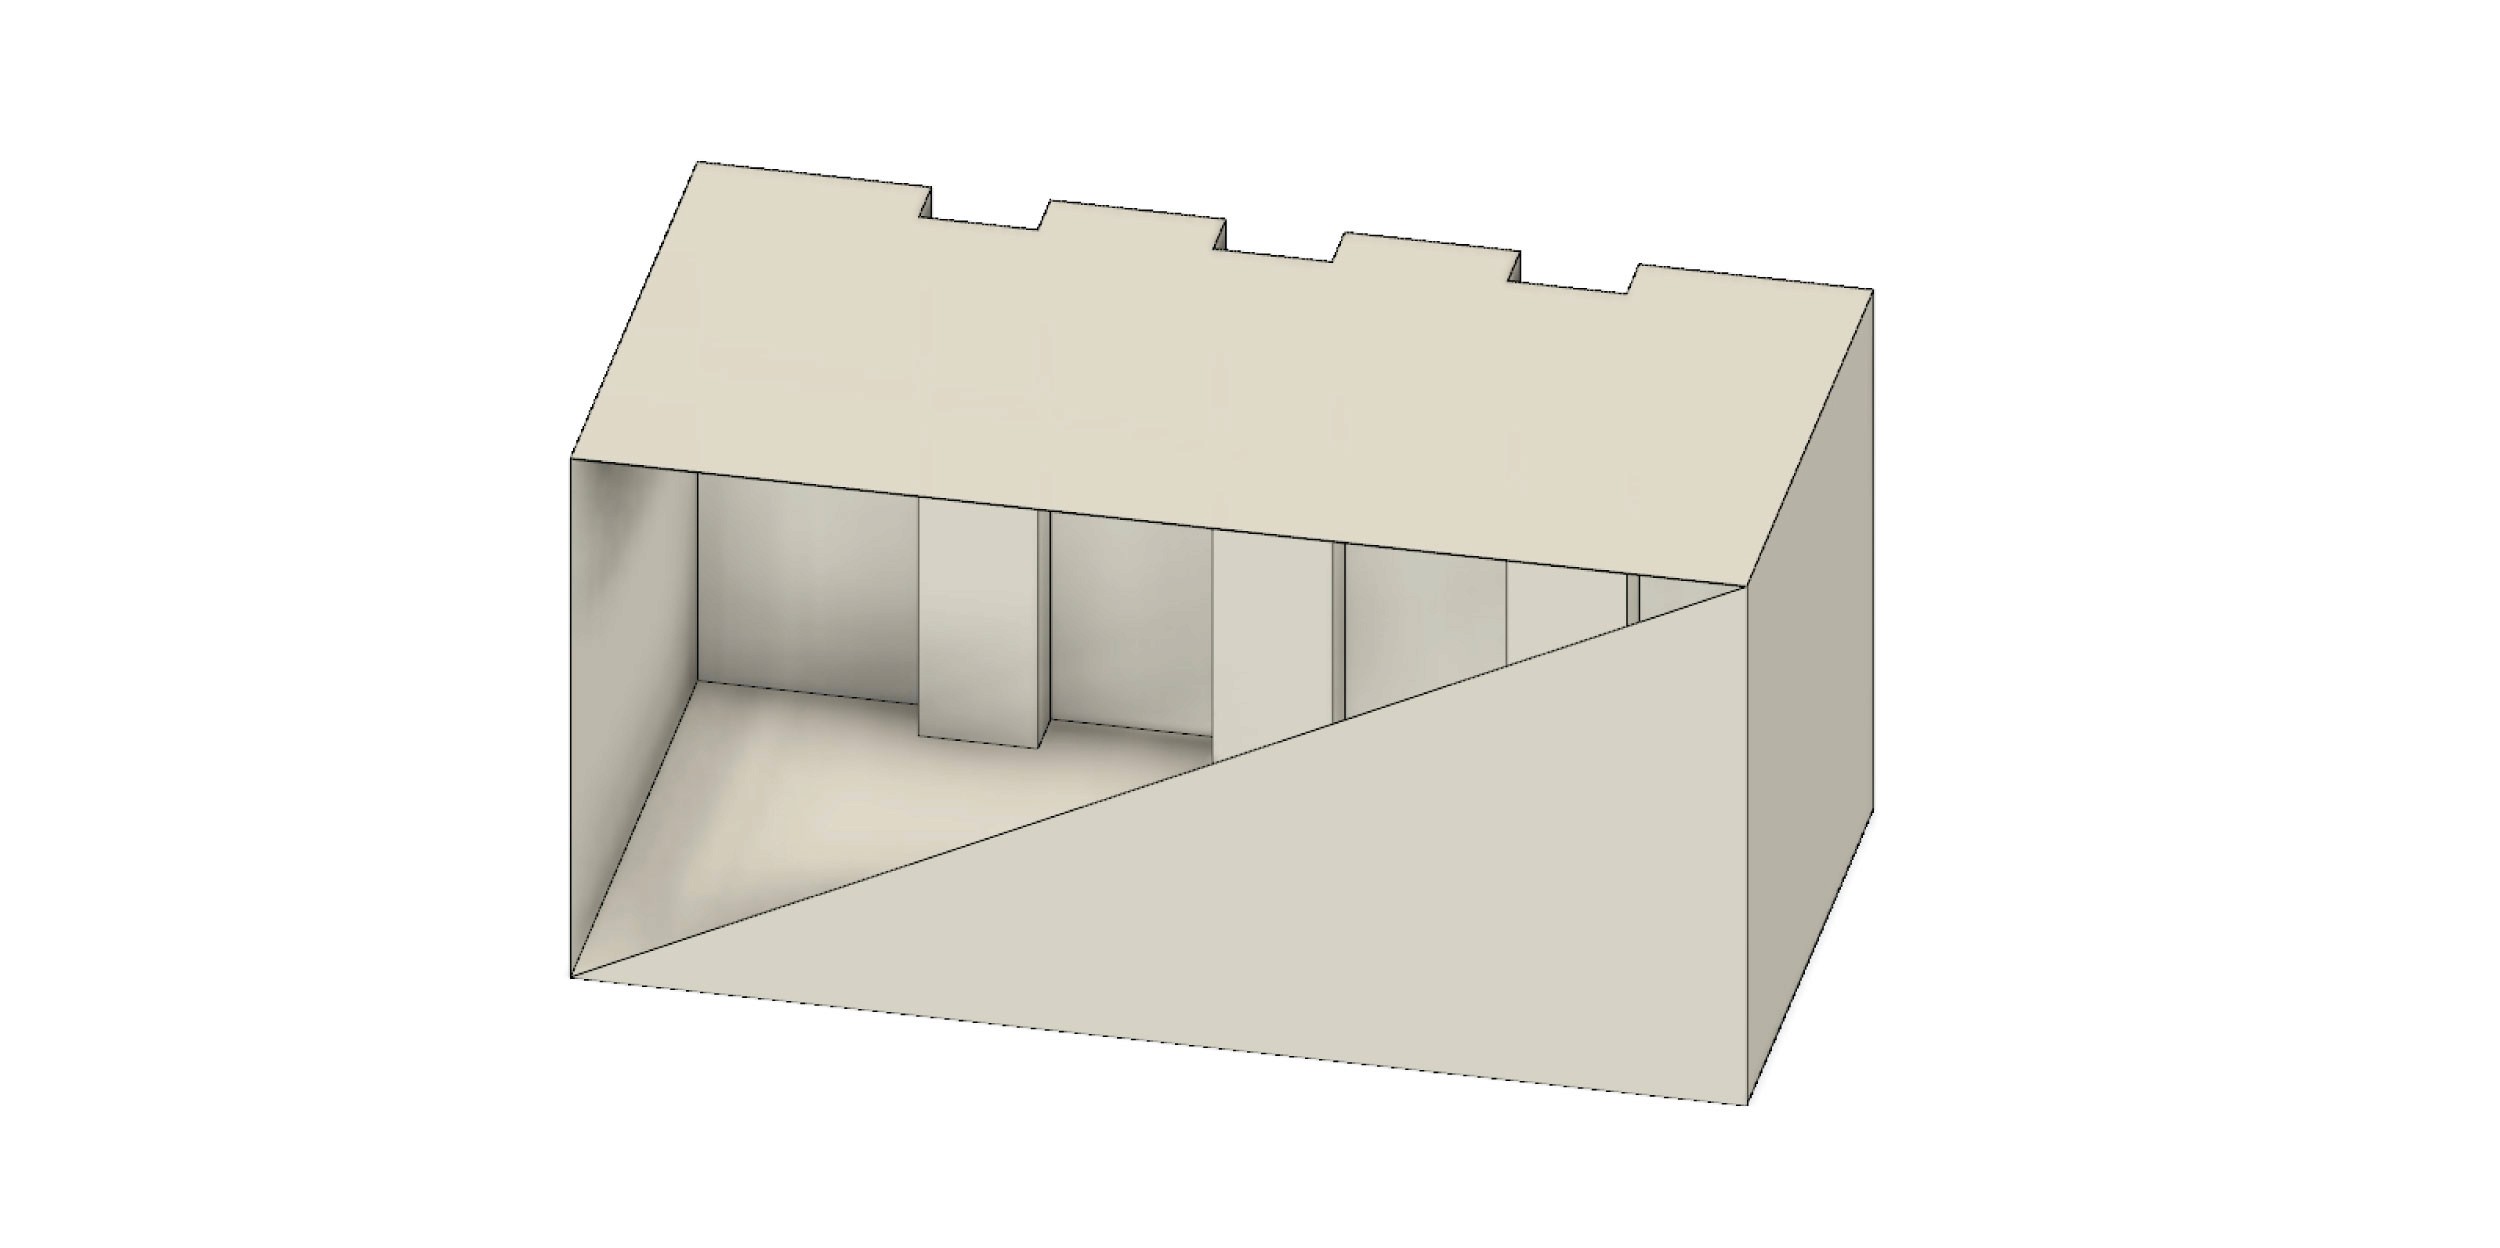
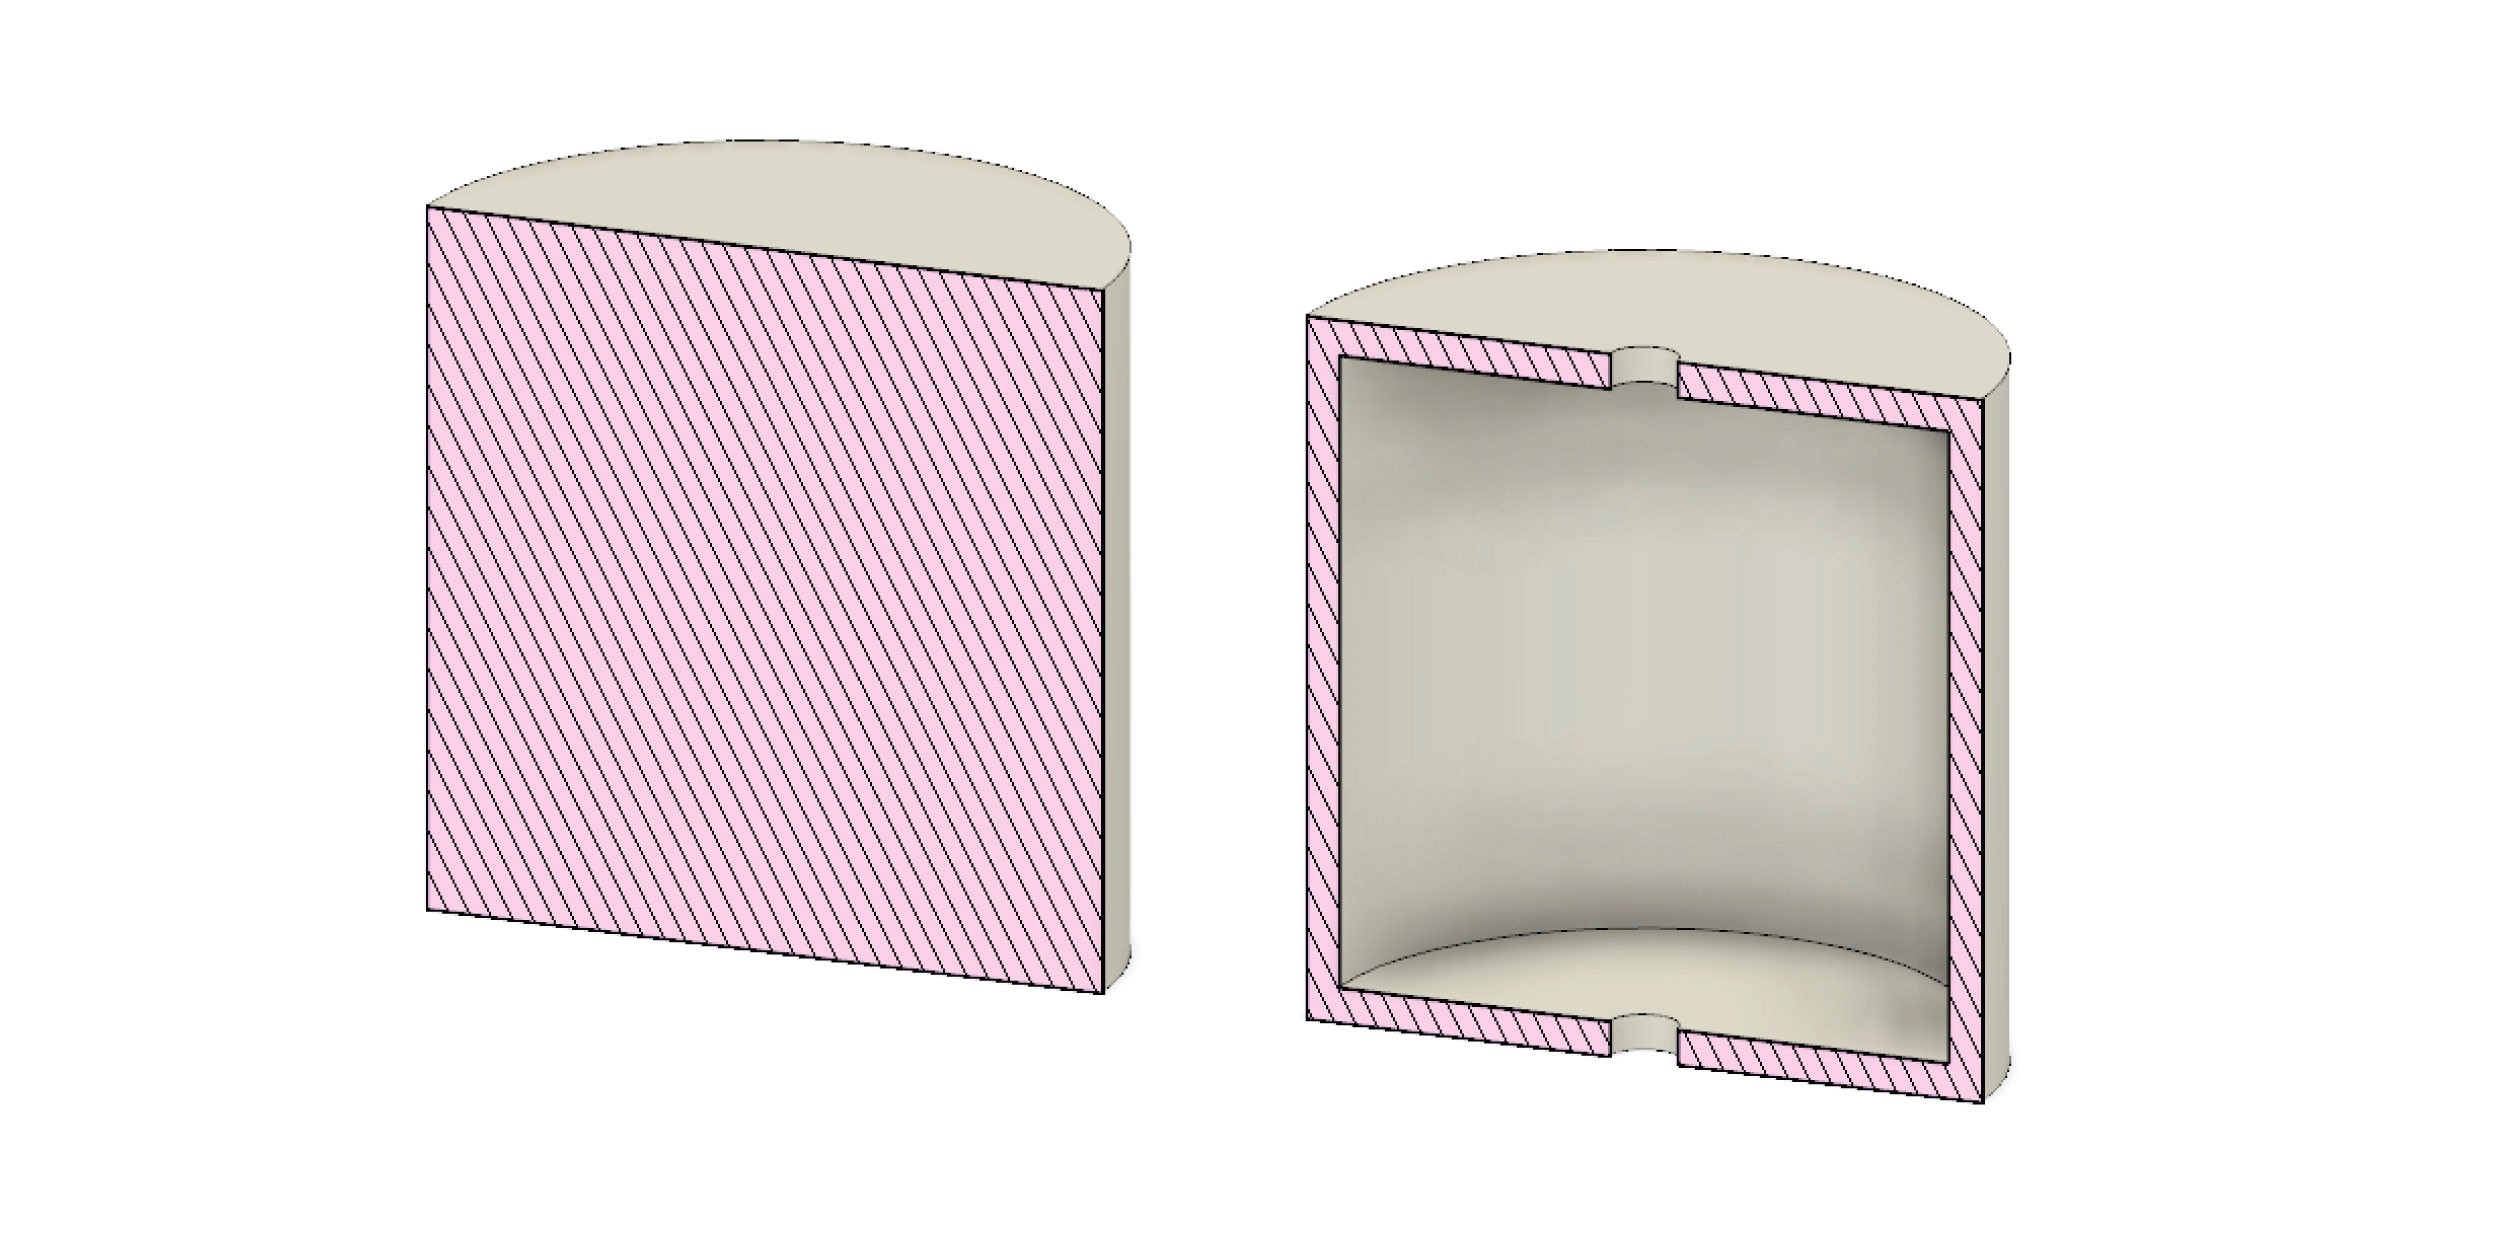
Hollowing 3D models
One of the basic 3D printing rules says that the more material is needed to manufacture a part, the more it will cost. Hollowing a 3D model means the interior of the design is emptied, reducing the print time, material usage and cost. The hollowing must be combined with escape holes where the resin or powder that is not used can be removed and in some cases reused.
It is important to consider that hollowing will reduce the cost, but the parts' strength will also be reduced. This process is recommended when prototyping with SLA and SLS 3D printers. This process should not be applied to parts printed with FDM 3D printers as the infill will generate a similar effect as hollowing.
Details size
Check the size of small details such as thin walls, decorative elements or engraved text. Each manufacturing tool and material has a minimum recommended size. Depending on the 3D printing technology, model orientation can also affect the detail quality.
This is especially relevant when you want to engrave small text. In order to improve the quality of the 3D printed object, it is recommended to use fonts with consistent stroke width.

Conclusion
It is common to make mistakes preparing models for 3D printing. Thankfully, most of the things that have been mentioned above can be easily implemented in most modelling workflows. It is imperative for both 3D printing consumers and manufacturers to understand how 3D printing works and how to design for it. 3D printing has changed how we design and manufacture because we can adjust and modify so many parameters that depend on the desired result but also on the 3D printer, material and design.
We hope this article is a useful guide for you to prepare your files for 3D printing (and avoid all the common pitfalls). If you found this article helpful, help others by liking and sharing it.

Get the latest articles on your inbox